Introduction
Spaces are where Jiglu users collaborate with each other. They bring together a group of people for a common project, perhaps from the same work team, or with a common interest, such as domain experts across different work teams or organisations. Each space has its own set of members and has controls over what they are allowed to see or do.
There are four types of content – what in Jiglu are called contributions – that a space holds in different sections:
- Discussion. Discussion messages are threaded conversations between members, available both on the web site (like a web forum) and on email (like a mailing list).
- Talk. Instant messages enable live chats to take place between members. Documents can also be quickly shared just by dragging and dropping them onto the talk page.
- Knowledge. Knowledge entries are where useful information and documents are captured for the long term. This section operates as a wiki, making it easy to link from one entry to another.
- Sources. Source items are content from external systems brought in on RSS feeds.
Spaces are just one kind of group in Jiglu. There are also blogs (which may be better for one-to-many communication) and monitors (for working with and analysing different kinds of external content).
Joining a space
There are two main ways you can join a space:
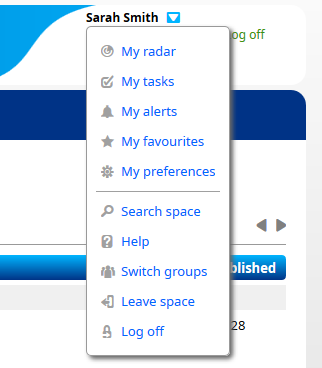
- You can find public spaces in the directory of spaces and then ask to join. The directory is available by selecting Spaces on the system-level navigation bar. You can then select the link to a space to view its home page. Some spaces in the directory may be open for anyone to read, for others you may need to be a member before you can read the content. You can join a public space using the form on its home page or by selecting the user menu at the top right of each page and choosing the Join space
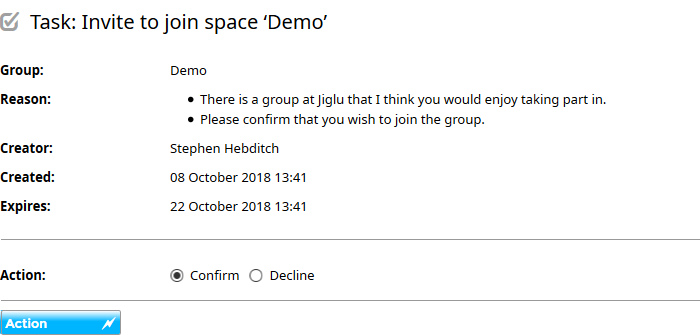
- You can get an invitation from an administrator or possibly a member of an existing space. When a space is private and not shown in the space directory this will be the only option you have for joining it. The invitation will be sent by email with a link you can click to join the space. If you go to My tasks you will also find a task that you can action to take the next step in the joining process.
Once you ask to join a space you may still need approval from a group administrator before the membership process is completed. You will receive an email welcoming you to the space once this is done.
If you later want to leave a space you can either follow the link in the Membership section on the space home page or select the user menu at the top right of each page and choose the Leave space option. You may still need approval from the administrator to leave the space.
Space home page
The space home page is where you will see a summary of all the things that have recently taken place in a space. Each space has its own home page, customised by its administrators for what they think will be useful for members. This can include summaries of new contributions, recent activities that you have carried out and the responses to them and general information about the space and your membership of it.
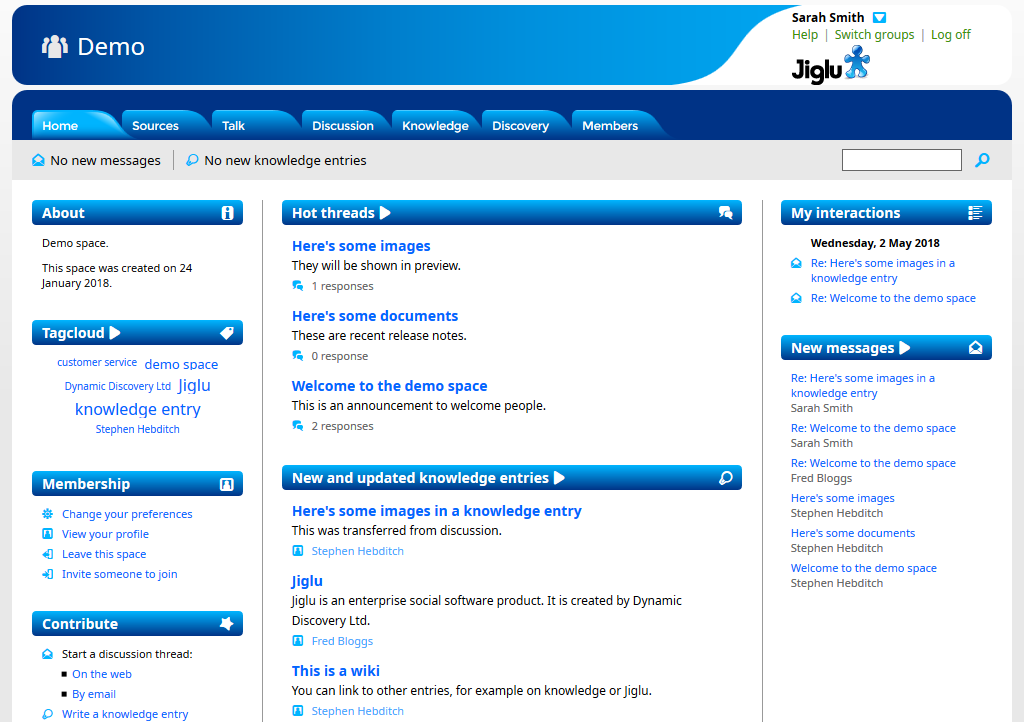
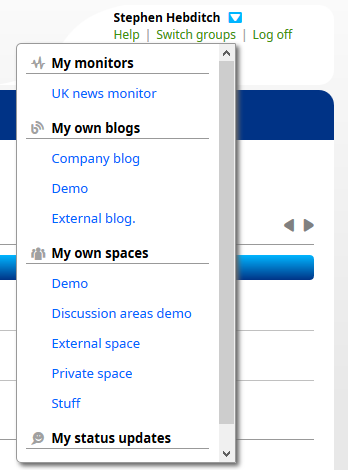
The quickest way to get to the home page of a space that you are a member of is to choose the Switch groups link at the top right of each page and then select the space that you want.
Discussion
Discussion is where longer, threaded conversations take place. Messages here are mirrored on an email mailing list, giving you a choice of where you wish to work: through the web or in your email client.
Selecting what email to receive
You can control what email you get for discussions by selecting the user menu at the top right of each page, choosing My preferences and then the Discussion email option. For each space you have three choices:
- Live – to receive a discussion message as soon as it is sent to the system.
- Digest – to receive an email bundle of discussion messages. There will be at least one each day and usually each time more than 20 discussion messages have been sent.
- No email – to not receive any email, so you will instead need to visit the website or keep updated with a newsletter.
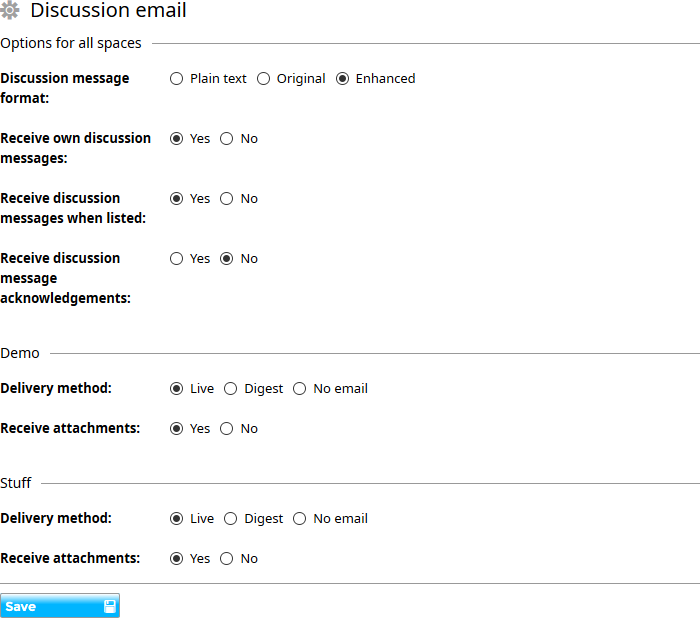
You also have a choice here of whether to receive attachments with a message or if you prefer to download them from the website.
Discussion areas
Some busy spaces may choose to divide up discussion into different areas. This can be useful for keeping different topics together but note that it isn’t possible to get email from only the areas that you are interested in – this is just for structuring things on the website.
If you select Discussion from the space navigation bar and areas are in use then you will first need to choose an area or that you wish to see messages from all areas. If areas are not used then you will instead be taken to the discussion thread view.
Threads, messages and poll indexes
Discussion messages are organised in three different views:
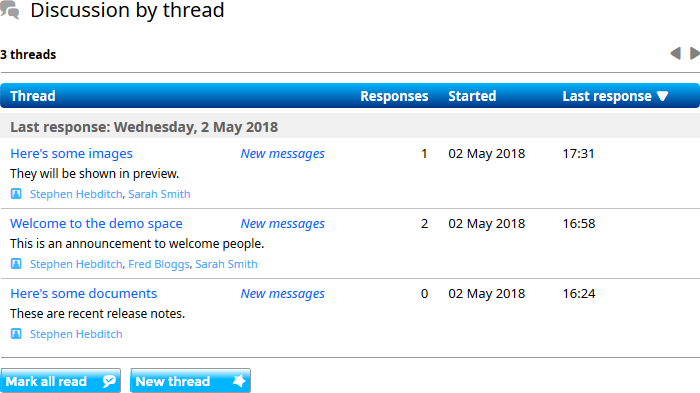
- By thread – here you can see messages organised into individual threads, with replies organised chronologically over a series of pages. Select the New messages link to view messages that you have not yet seen in a thread. When you have finished reading all that you want select the Mark all read button on the thread index.
- By message – here you can see messages one per page in chronological order.
- By poll – here you can see messages that contain polls.
You can also search messages for those containing particular words, published in a particular time period or written by a particular user.
Viewing a message
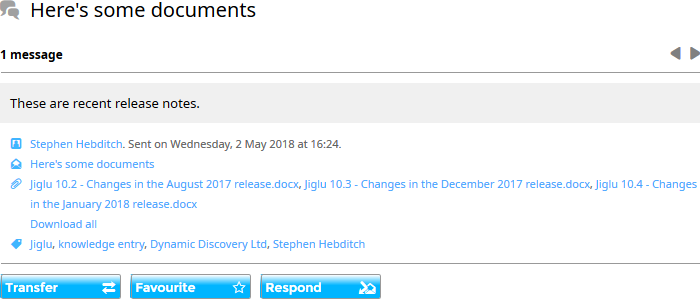
Whichever view is chosen, each message shown has the same basic format:
- The text of the message. This can include images, videos or content embedded from other websites. If the message is a reply then any quoted text will be ‘folded’ away. Select the plus sign button on the right to display this text.
- Any poll contained in the message. If the poll is still open for voting and you have not yet voted then you will be able to do so, otherwise you will be able to view the results of the poll. If you do not wish to vote then selecting View poll results will let you see how voting currently stands.
- Any images in the message. A thumbnail is displayed for each image and if there are more than will fit the width of the page then you can scroll left or right using the arrow buttons or your mouse wheel. Selecting an image will open it up on the page.
- Any embedded messages, such as when a message is forwarded on to the space as an attachment rather than inline in a message.
- The author of the message, what message it is a response to and when it was sent. If you hover over the author link you will be able to see more information about them and selecting it will take you to their profile. If you hover over the parent message you will be able to see information about it and selecting it will take you to the message.
- The subject of the message. If you hover over this link then you will be able to see what it is in reply to and what replies others have made in response. If the message has been forwarded elsewhere and you have permission to view that group then this will also be shown.
- Any attachments to the message. If you hover over the link to an attachment then you will be able to see more about the attachment, including its format, size and possibly a text description when this is available. Selecting the link will download the attachment. If there is more than one attachment then there will also be a link to download them all.
- Any links to external websites and inline links to knowledge entries in this space. Hovering over a link will show a summary of the page that is being linked to, if available.
- Any tags. Selecting a tag will let you see other contributions in the space with the same tag.
- Any specific recipients of the message, for example when the space has been Cc’ed along with a number of other email addresses.
Writing a message
There are two ways of writing messages:
- To respond to an existing message select the Respond button beneath the message. A dialog box will open on the page with a form for you to enter your response. You can also reply to a message in your mail client as normal to have the reply sent to the space and distributed to members.
- To start a new thread, select the New thread button or Start a new discussion thread action in the sidebar on one of the discussion index pages. You will then be taken to a form where you can enter your message. You can also email in a message in your mail client by select the Email a new discussion thread action in the sidebar on one of the discussion index pages.
If you use the website to write your message then you may have a choice of whether to enter messages as plain text or as rich text with styles using an HTML editor. You can make the choice by selecting the user menu at the top right of each page, choosing My preferences and then the User basics option. The Input method for messages and Input method for comments fields will let you choose which option you want.
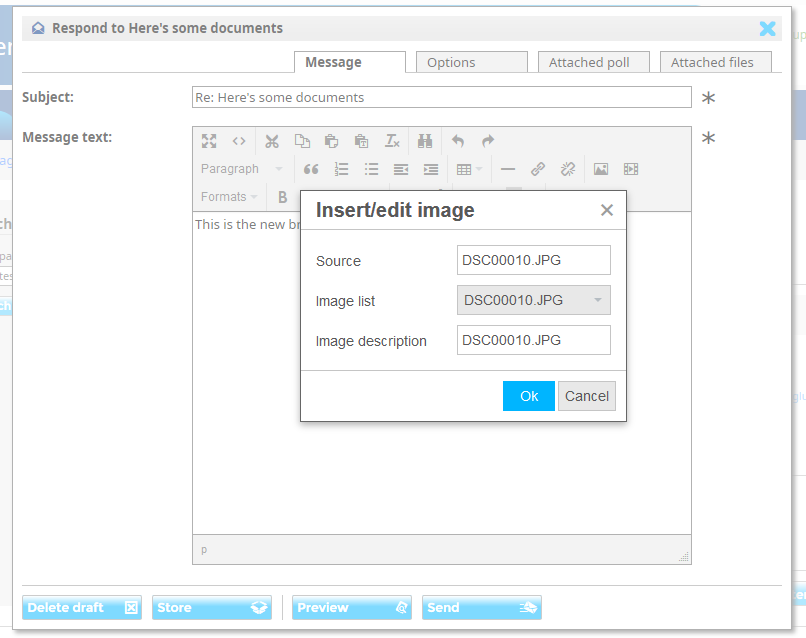
The HTML editor also lets you include attached images within the text of your message by selecting the Insert / edit image button and may allow you to embed video or other assets from external sites by selecting the Insert / edit embedded site button. Help on using these can be found in the Using Jiglu support space.
Attachments can easily be added to a message either by selecting the Browse files button and choosing with the file selector or by dragging and dropping files from your desktop onto the page. Note that you may be subject to additional moderation approval for large files or some file formats, and some formats may be explicitly disallowed.
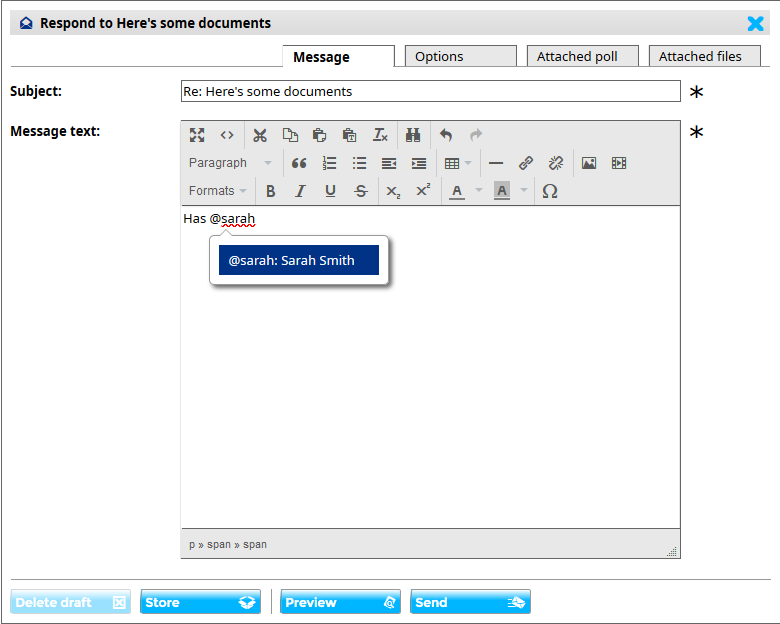
If you want to mention another user in your message, alerting them to the conversation, then type the ‘@’ symbol followed by their username. As you start typing a popup menu will appear that lets you easily insert the right name.
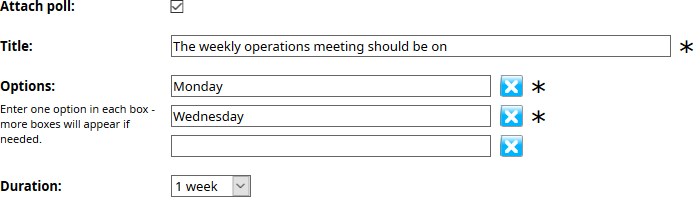
When you want to try and reach consensus around an issue, it may be quicker to include a poll. You can do this by selecting the Attach poll button when starting a new thread or the Attached polls tab when responding to an existing message. You will be asked to choose a title for the poll and can then enter up to ten choices, along with how long the poll is to remain open for. Note that only one poll is allowed per discussion thread so if a thread already has a poll you will need to start a new thread if a second poll is really required. Messages with polls may be subject to additional moderation approval.
Once you are happy with your message you can see what it will look like when published by selecting the Preview button or send it by selecting the Send button. If you want to come back later to finish work on the message then select the Store draft button. You can see all your drafts by selecting the user menu at the top right of each page and then the My tasks option. Note that there may be a limit on how many drafts you are allowed at one time. Messages may be subject to approval first, so it may not appear immediately.
Talk
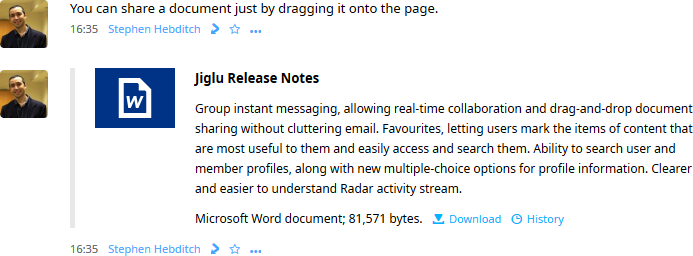
Talk is where live discussion takes place. Anything you type will appear instantly on the screens of other users that are also viewing talk for that space. You can also quickly share files with others by simply dragging them from your desktop and dropping them onto the page.
To enter a new instant message click on the message box at the top of the page and start writing. A typing indicator will appear on the screen of all users that are also viewing talk. When you press enter it will be sent to everyone. If you wish to direct a message as a reply to an existing message then select the respond icon underneath the appropriate message. A box will open up underneath the message for you to write your reply.
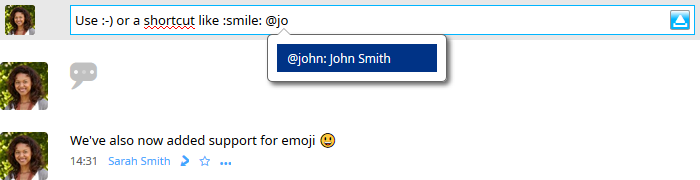
If you want to mention another user in your message, alerting them to the conversation, then type the ‘@’ symbol followed by their username. As you start typing a popup menu will appear that lets you easily insert the right name. To use emojis in your message either enter the emoticon, such as :-), use a standard emoji shortcut, such as :smile:, or select one with the picker on your operating system (on Windows 10 use Windows key and ‘.’ together).
When messages are displayed their text will include any tags that are recognised for the space, inline links to knowledge entries in the space and external links to other websites. If there is just one external link then a summary of the page will be shown underneath the message text. Hovering over a link will show a summary of the page that is being linked to, if available.
To share a file either select the Upload button on the right of the message box at the top of the page or drag a file from the desktop and drop it onto the page. Once it has been uploaded and processed a summary of the file will appear and it will be available for downloading. Note that there may be restrictions on the format of files that can be shared.
Knowledge
While discussion and instant messages are great for quickly sharing information of the moment, there is also knowledge that needs to be captured and made more suitable for retrieval in the long term. This is where the knowledge wiki comes in.
Differences from discussion messages
Knowledge entries are very similar to discussion messages in how they look and what they contain but with some important differences:
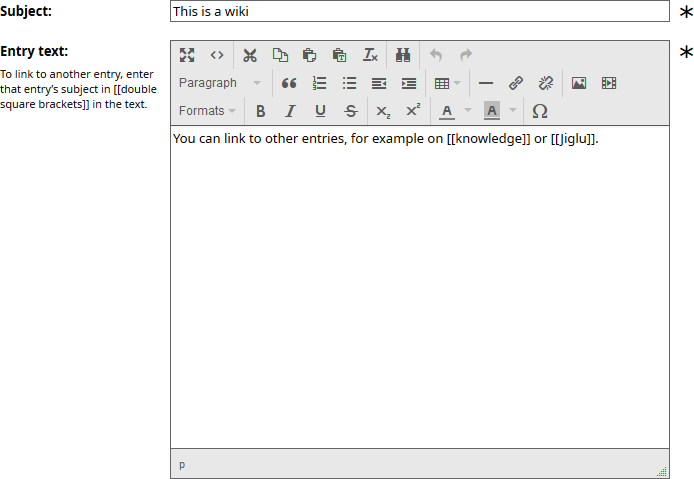
- You can easily link to a knowledge entry by putting its name in double square brackets – what’s called an inline link and sometimes known elsewhere as a wiki link. You can not only link from one entry to another but from discussion messages and instant messages to a knowledge entry too.
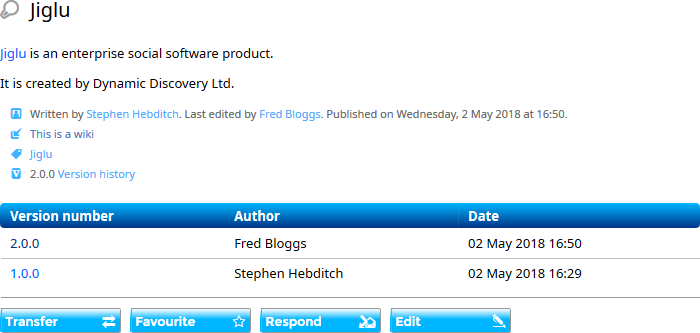
- Entries are versioned. Each time you make an edit to an entry a new version is created. If you have permission then you can go back and see earlier versions of an entry and revert changes back to an earlier version if needed. If two people start making changes to an entry at the same time then the user that submits their entry for publication last will be told about this and will need to merge their changes with those of the other entry.
- Entries have different workflow. They may need approval before they be published, possibly from more than one other member of the space, and they may be subject to later checking that they are still current once they have been published for a certain number of days.
Entry index
The knowledge entry index lets you see entries in chronological order. You can also search entries for those containing particular words, published in a particular time period or written by a particular user.
Viewing an entry
When you view a knowledge entry you’ll see it has a similar format to discussion messages but with a few differences:
- It won’t contain any polls or embedded messages.
- You will be able to view who originally authored the entry and who made the last change to it.
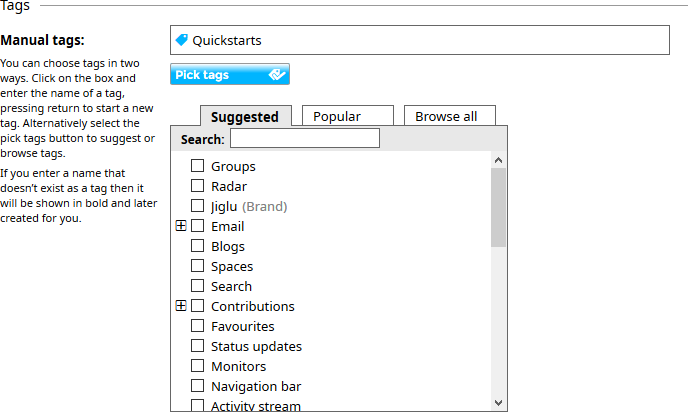
- As well as automatic tags generated by the system from the text of the entry and its attachments and their metadata, you can also manually assign tags. These are shown first in the list of tags and displayed in bold.
- If you have permission you will be able to view earlier published versions of the entry by selecting the Version history
- Any discussion message responses to that version of the entry will be shown after the entry.
Writing an entry
There are several ways that you can start writing a new entry:
- On the knowledge entry index page select the New entry button or Write a new knowledge entry action in the sidebar to begin an entry of your choice.
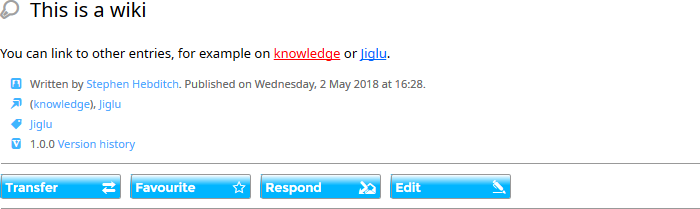
- When viewing a knowledge entry, if you see an inline link that does not yet have an entry as its target then selecting it will let you write an entry for that name. Unresolved inline links are normally shown in red in the text of an entry and will be shown in brackets in the list of inline links under the entry.
- When viewing any contribution you can transfer it into a new knowledge entry by selecting the Transfer button or action for that contribution. For example, if you’re reading a discussion message and think that the information it contains would make a great entry then select the Transfer button, choose where you want the entry created and then edit the text to make it more suitable for a reader coming to the information without any background. Underneath the entry will be a link back to where in the discussion it originally came from, so readers can understand the context if needed.
- When viewing a tag of a particular name you have the option to write an associated knowledge entry for that tag by selecting the Add a new knowledge entry with this tag action in the sidebar. If there is already an entry for that tag name then there will instead be a View the knowledge entry for this tag action in the sidebar.
The knowledge entry editor is very similar to the one for discussion messages but with a few differences:
- You can add a description for the entry to be shown in the index and searches and notes for the current version of it.
- You can manually choose tags that you want the entry classified under. You can either start entering their names, with the system suggesting similar ones that already exist, or if you select the Pick tags button you can see tags suggested for the entry and browse through or search ones that already exist.
- If you are editing an existing entry then you can select the Revert button to go back to an earlier version if you are not happy with the changes in the version that you are currently editing.
Once you are happy with your entry you can see what it will look like when published by selecting the Preview button or submit it for publication by selecting the Publish button. If you want to come back later to finish work on the entry then select the Store draft button. You can see all your drafts by selecting the user menu at the top right of each page and then the My tasks option. Note that there may be a limit on how many drafts you are allowed at one time.
Sources
Sources are RSS or Atom feeds that a space subscribes to. Sources are also available in a monitor group with a lot more additional features and other ways of bringing information into the system. However, there may still be times when you want to bring in feeds into a space, for example when you need information from an external system that is relevant to the space’s members.
The source index lets you see items in chronological order. You can also search items for those whose subject or description contains particular words, were published in a particular time period or come from a particular source.
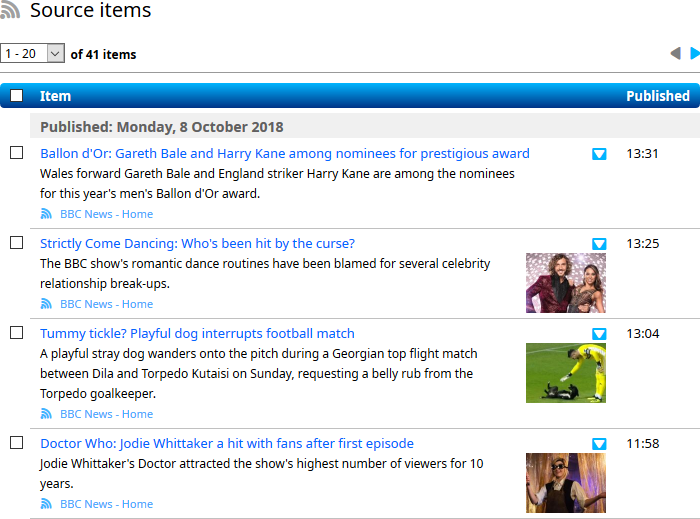
Selecting the link for a source item will take you through to that page on the external site. You can also start a discussion around a source item by selecting Discuss from the dropdown menu to right of the item’s title.
Discovery
The discovery section holds information that the system has found by examining the content of contributions. It helps you make connections between different pieces of information both within a space and in other groups.
There are four subsections in Discovery:
- Tags shows you how contributions have been classified, using both tags that members have manually entered and ones automatically generated by Jiglu’s Dynamic Discovery engine from examining the content and metadata of contributions and attachments. More information about tagging is available in the Tagging Quickstart.
- Links shows you all the links that have been mentioned in contributions. This gives you an easy overview to external sources of information that members of the group have found useful. For each link you can see the history of every time it was used.
- Attachments shows you every attachment added to a discussion message or knowledge entry. Those with the same content or similar names are grouped under the same name, giving you a complete history of where they were used and letting you easily trace different versions of the same document.
- Insight provides content analytics, letting you see visualisations of top and trending tags and the activity taking place in the space.
Members
The members section is where you’ll find an index of all the members in the space and their personal profiles giving information about their involvement in the group.
The member index shows basic information about each member, such as their name and username, and possibly important information taken from their profile that the administrator wants to highlight here. You can also search for members in a variety of different ways, including their name, when they joined, what they have written in their profile and specific answers to multiple-choice profile entries.
Selecting the link for a member will take you to their profile. Information in the profile will include:
- Basic information about the user and their photo, in common with their user profile.
- Details they have entered in their user profile, shown in the global directory of users.
- A summary of their involvement in the group, such as when they joined and how active a participant they are.
- Details they have entered in their member profile, specific just to this space.
- A stream of recent activities that they have carried out in the space.
If you have permission, the member index may also contain an action letting you invite new members to the space. You may also find a link to invite a user on the home page of the space.